
How to organize cleaning closet efficiently comes down to two things most people skip, setting clear zones and making the “put away” step almost effortless.
If your closet feels like a black hole for half-used sprays, random sponges, and mystery bottles, you’re not alone, and it’s not a motivation issue. It’s usually a layout and labeling issue, plus a few safety gaps that quietly create mess over time.
This guide walks you through a practical setup that works for real homes, including a quick sorting method, a simple zoning plan, and a maintenance routine that takes minutes, not a full Saturday.
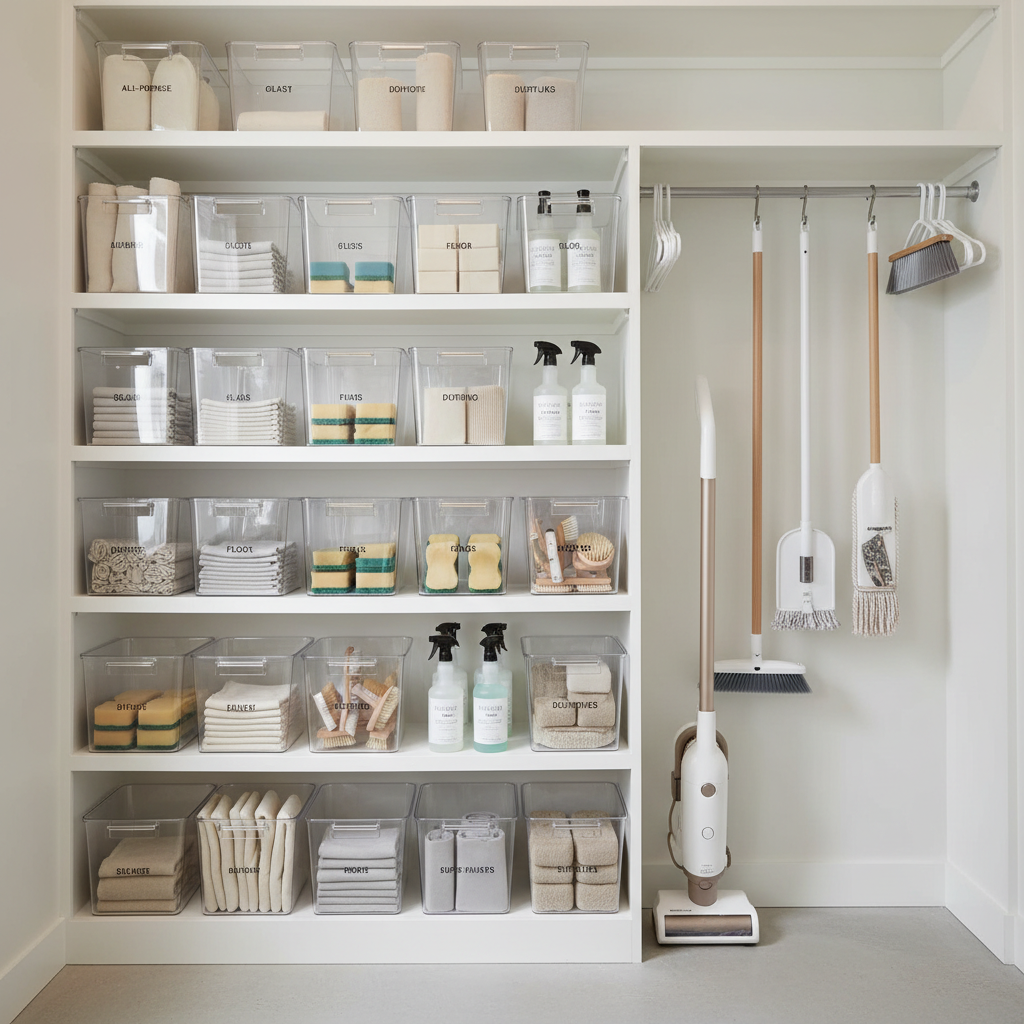
Why cleaning closets get messy (even in organized homes)
Most cleaning closets aren’t designed like pantries, they’re narrow, dark, and full of tall items that topple. Even people who stay on top of laundry and dishes can lose control here.
- Too many “almost the same” products (three glass cleaners, two degreasers) create clutter and decision fatigue.
- No assigned parking for small tools like scrub brushes, gloves, and sponges, so they drift.
- Mixing backstock with daily-use items makes the closet feel overfull, and you end up buying duplicates.
- Awkward storage for mops and brooms causes leaning piles that block shelves.
- Safety compromises, like loose caps or unclear labels, often lead to “I’ll deal with it later” piles.
Once you see it this way, organizing stops being a personality test, it becomes a small system design problem.
Quick self-check: what kind of cleaning closet do you have?
Before you buy bins, figure out which situation you’re solving. Different closets need different rules.
- “Crowded but useful”: you use most items, but space and visibility are the problem.
- “Duplicate city”: you keep rebuying because you can’t find what you already own.
- “Family traffic”: multiple people grab supplies, and nothing returns to the same spot.
- “Kid/pet risk”: products are reachable, or caps and labels aren’t consistent.
- “Small closet, big tools”: mops, vacuum parts, and brooms dominate the footprint.
If you relate to more than one, that’s normal. Pick your top two problems, and design around those first.
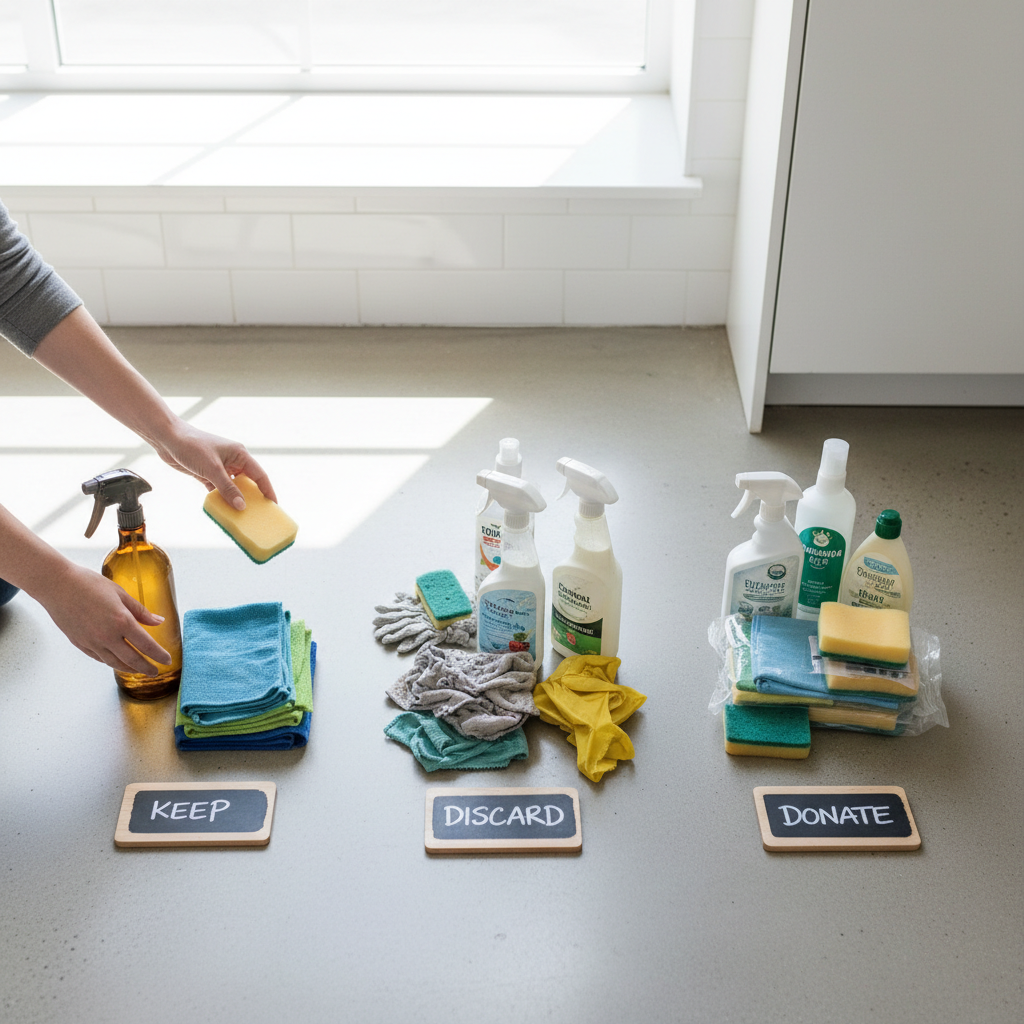
Step 1: Do a fast purge without overthinking it
To organize a cleaning closet efficiently, you need less “stuff that might be useful” and more “stuff you can grab in 10 seconds.” Aim for one focused pass, not a perfection project.
A simple three-pile sort
- Keep: you used it in the last 3–6 months, or it’s a true staple (dish soap, disinfectant, trash bags).
- Relocate: items that belong elsewhere (car cleaning supplies, outdoor chemicals, paint tools).
- Discard: leaking containers, products with missing labels, tools that smell musty and never dry out.
For anything you’re unsure about, set it in a “maybe” box and date it. If you don’t touch it in 30 days, it usually isn’t essential.
Safety note on old or unknown chemicals
If you have unmarked bottles or you’re not sure how to dispose of something, avoid mixing or pouring it out. According to U.S. Environmental Protection Agency (EPA), household hazardous waste often needs local disposal guidance, so check your city or county program.
Step 2: Create zones that match how you actually clean
The best closet setup is boring in the right way, every category has a home, and the homes match your habits. Most households do well with 4–6 zones.
- Daily/weekly: all-purpose cleaner, glass cleaner, microfiber cloths, disinfecting wipes.
- Deep clean: scrub pads, grout brush, specialty cleaners you use monthly or seasonally.
- Laundry: detergent, stain remover, lint roller, mesh bags.
- Trash + paper: trash bags, paper towels, toilet paper backup.
- Tools: gloves, dusters, sponges, broom heads, vacuum attachments.
- Refills/backstock: duplicates and bulk refills, stored higher or deeper.
Keep your most-used zone at eye level. Anything you use once a quarter can live higher up.
Step 3: Use the right organizers (a small upgrade beats a huge overhaul)
You don’t need a full closet system. You need a few pieces that stop tipping, leaking, and drifting. This is where many “pretty closets” fail, they look good but don’t survive real use.
Organizer choices that usually pay off
- Two to four handled bins for zones, so you can pull a whole category out without unpacking a shelf.
- A lazy Susan for small bottles, especially in deep shelves where things disappear.
- Over-the-door rack for gloves, cloths, lint rollers, and lighter items.
- Command hooks or a wall-mounted tool holder for brooms and mops, to avoid the “leaning domino” effect.
- A shallow tray under liquids to catch drips and keep labels readable.
Clear bins look clean, but solid bins hide visual clutter. Pick what helps you maintain it, not what photographs best.
A quick planning table (what to store where)
| Item type | Best placement | Why it works |
|---|---|---|
| Daily cleaners | Eye-level shelf in a handled bin | Fast grab-and-return, fewer “temporary” piles |
| Backstock refills | Top shelf or back of a deep shelf | Keeps working inventory visible |
| Sponges, brushes, gloves | Door rack or small divided bin | Stops small items from disappearing |
| Mops and brooms | Wall hooks/tool holder | Frees floor space and prevents tipping |
| Loose bottles | Tray or shallow bin | Contains leaks, easier wipe-down |
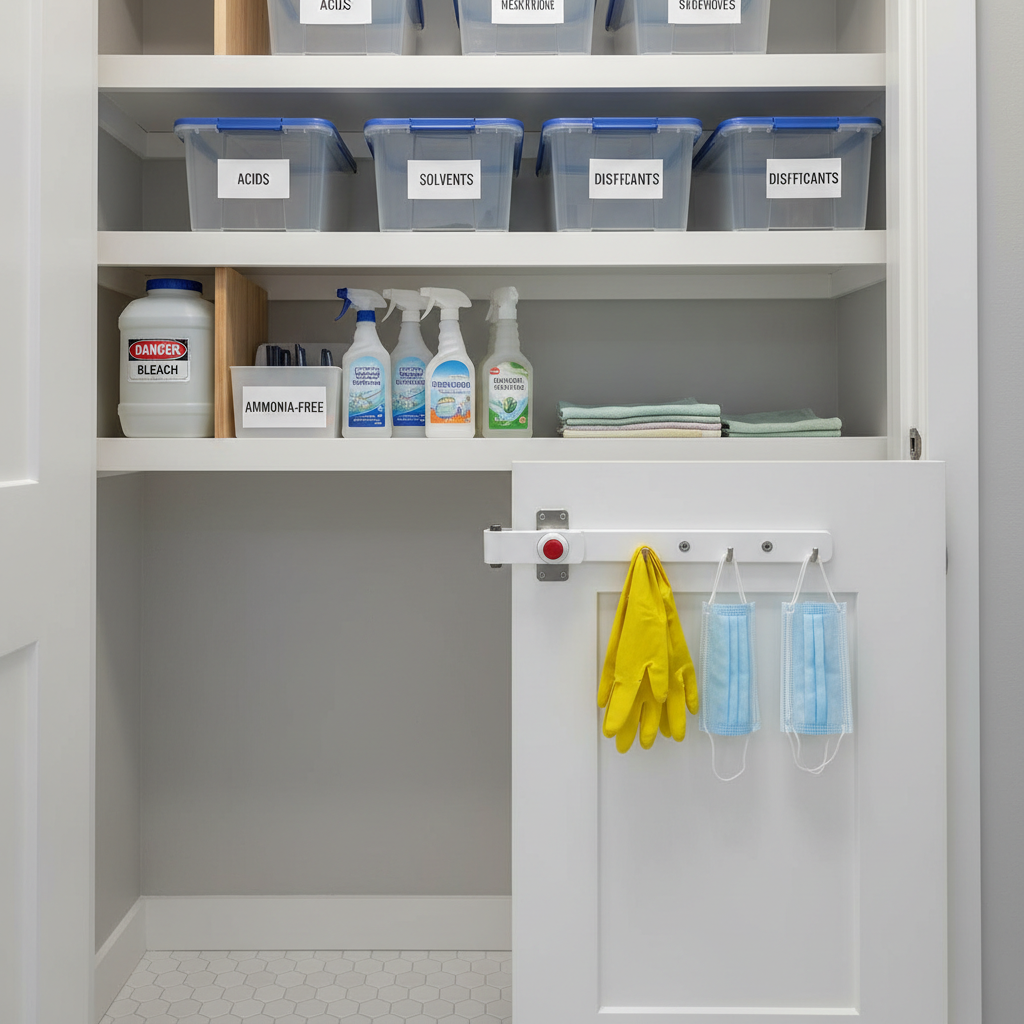
Step 4: Set up safer storage (this matters more than aesthetics)
Safety is part of efficiency, because spills, fumes, and mystery bottles slow everything down. If kids or pets can access the closet, take a more cautious approach.
- Keep products in original containers with intact labels when possible.
- Separate reactive chemicals, avoid storing bleach next to ammonia-based cleaners to reduce risk of accidental mixing.
- Store heavy liquids low to reduce falling risk, and to prevent awkward lifting.
- Add ventilation when possible, and avoid overcrowding tightly sealed spaces with strong fumes.
- Use child-resistant measures if needed, a simple latch can be more effective than “out of reach.”
According to Centers for Disease Control and Prevention (CDC), mixing certain household cleaners can create dangerous gases, so label clearly and keep “do not mix” items physically separated. If you suspect exposure or poisoning, contact Poison Control for guidance.
Step 5: Make it easy to maintain with a 5-minute routine
Most closets fall apart because the system requires too much effort when you’re tired. A low-friction reset keeps the win going.
The “close-the-door test”
If you can’t put everything away and close the door without shoving, you’re storing too much in that space, or the zones aren’t realistic. Adjust until closing the door feels normal, not like packing a suitcase.
A simple maintenance rhythm
- Weekly: return items to zones, toss empty bottles, wipe obvious drips.
- Monthly: check backstock, move one refill forward, add one item to your shopping list.
- Seasonally: reevaluate specialty products, and relocate anything you didn’t touch.
Keep a small notepad or a phone note titled “Cleaning Closet Restock.” When you notice you’re low, write it down, don’t trust memory.
Key takeaways (so you don’t overcomplicate it)
- Zones beat shelves. If categories are clear, the closet stays organized longer.
- Backstock belongs out of the way. Daily-use items should be the easiest to reach.
- Handled bins make returning things simpler. You’re organizing future you, not impressing guests.
- Safety and labels are part of efficiency. Fewer unknown bottles, fewer headaches.
Wrap-up: a practical next step you can do today
If you want to organize a cleaning closet efficiently without turning it into a weekend project, start with one action, pull everything out, make keep/relocate/discard piles, then put back only daily-use items in one labeled bin. Once that shelf works, the rest becomes much easier.
If you’re ready for a little extra momentum, set a 10-minute timer tomorrow to create two more zones, tools and backstock, and you’ll feel the difference every time you grab supplies.